How do I use EPSON LFP Remote Panel 2?
RELATES TO:
- EPSON LFP Remote Panel 2
- Operating Systems:
- Microsoft Windows
- Windows 7
- Windows 8
- Windows 10
- Apple
- Mac OS X
- macOS
- Microsoft Windows
- Large Format Printers:
- EPSON Stylus Pro series
- Epson SureColor series
EXPLANATION:
Epson LFP Remote Panel is a software application that will allow you to update firmware, create custom paper settings and adjust the paper feed settings. LFP Remote Panel can be downloaded from the Epson website on your product's driver page and can also be found on the driver CD supplied with your printer. The Epson driver is required to be installed in order for you to use this software.
|
Windows Vista is used to demonstrate LFP Remote Panel 2; use of the software will be similar using different operating systems and an earlier version of LFP Remote Panel. There is currently no compatible version of LFP Remote Panel for Mac OS X Lion. |
Main screen
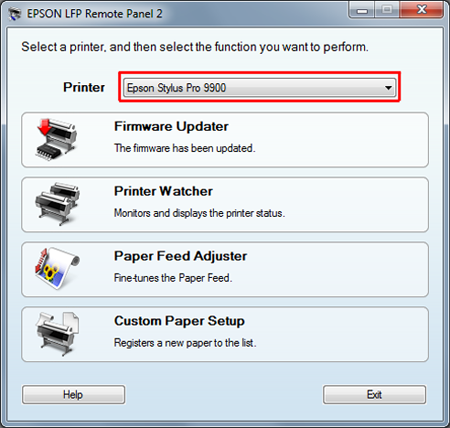
On the main screen you will need to select your printer from the drop-down menu.
Firmware Updater
|
The printer will need to be directly connected by a USB cable to the computer in order to update firmware, it is not possible to perform the update with an Ethernet connection. |
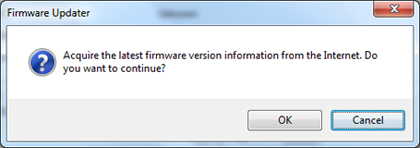
The first screen you see asks you if you want to automatically check for later versions of the firmware online, click OK to continue.
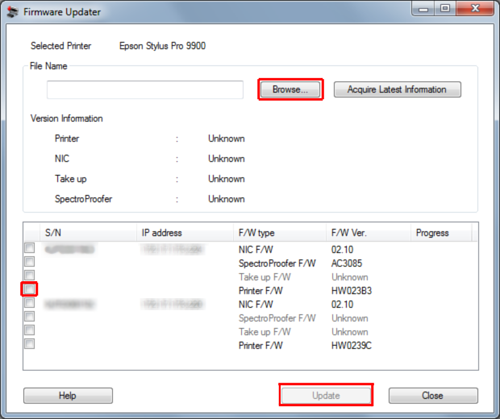
Once this has completed the search you can select the item of firmware you would like to update on the left side and click the Update button (automatic updates are only available in LFP Remote Panel 2, earlier versions will require manually downloading the latest firmware versions). Alternatively, you can manually download the firmware file from your printer's driver page on the Epson website, then click the Browse button and point it at the location of the file.
The firmware update tool supports the following file extensions: *_q.UPG (printer), *.EFU (network), *_q.OPG (SpectroProofer) and *.FPG (all).
Printer Watcher
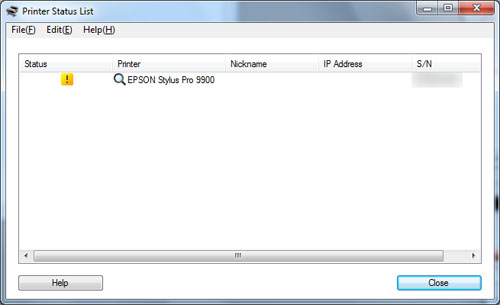
Printer Watcher displays the printer status on the computer monitor, including real time status of ink levels, maintenance tanks and other error messages. It is also possible to set up email notifications, alert sounds and status windows for when errors occur or consumables are running low. To configure Printer Watcher, set it up in the Preferences dialog box. For further information, please refer to the Help section in the main screen of LFP Remote Panel.
|
Ensure the account being used has administrator rights when using Printer Watcher. |
Paper Feed Adjuster
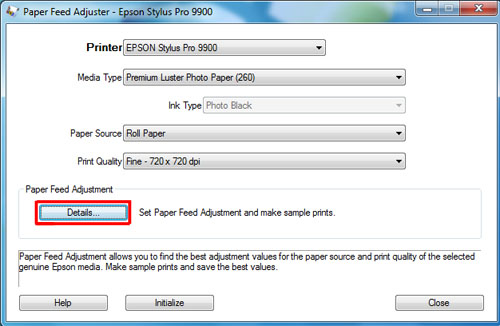
Paper Feed Adjuster allows you to customise the values for the combination of paper type, paper source and print quality. It is possible for this adjustment to significantly reduce the effects of banding in some cases. Click on the Details button in order to print out a sample print, adjust the value accordingly and then print another sample to confirm if these have been adjusted correctly.
|
Using this feature incorrectly may cause print quality issues. |
|
For further information on adjusting the settings correctly please refer to the Help section in the main screen of LFP Remote Panel.
Custom Paper Setup
When you are using the Epson printer driver and media, all settings in the Custom Paper Setup dialog box are automatically preset for optimal results. However, for non-Epson special media, sometimes banding or ink bleed occurs due to the characteristic of non-Epson special media. If you still have trouble after performing the Nozzle Check or Print Head Alignment operation, this may be caused by the detailed print settings not being suitable to the type of non-Epson special media.
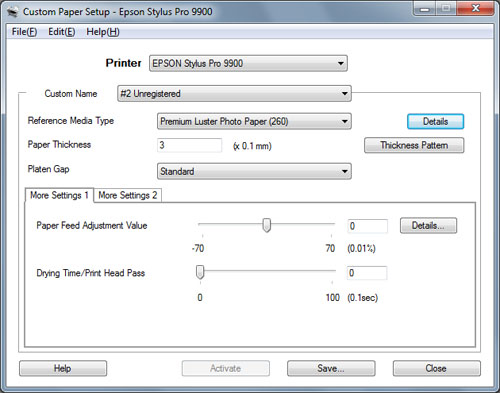
In the Custom Paper Setup dialog box, you can adjust the print settings in accordance with the paper you use, and register the settings to the printer as a custom paper.
It is possible to setup ten different custom paper presets, however only one can be active on the printer at a time. To activate a preset paper profile, after selecting the correct settings within the screen below, click the Activate button. This will then set the profile as active on the printer and will show No. 1 for example, on the printer's panel.
|
Once a custom profile is active on the printer this will be used for all print jobs sent to it in the future. If you are experiencing unusual print results, check that the profile selected is correct for the media you are printing on. |
For further information on creating a custom paper profile please refer to the Help section in the main screen of LFP Remote Panel.