How do I use the Print Head Alignment utility in Windows?
This article explains how to use the Head Alignment utility in Windows 7, Windows 8 and Windows 10. Use this utility to realign the print head if your printouts show broken text, with either misaligned vertical lines or horizontal banding.
|
If you have the SX200 / SX205 or SX400 / SX405, do not follow this article. Instead you should consult the User Guide that came with your product where you will find instructions on using the Head Alignment utility. |
Instructions:
Carry out the checks below before using the Head Alignment utility:
- Run the Head Cleaning utility to confirm that the print head is performing optimally.
For instructions on how to do this see the following Related Article: How do I use the head cleaning utility in Windows?
- Make sure that no error lights or error messages are displayed on the printers control panel. If only a solid green light is on the printer and no error messages are present on the LCD panel, the printer should be capable of normal functions.
 Note:
Note:- A red or amber light indicates an issue with the printer. Both the error and light needs to be cleared in order to print again or undertake further troubleshooting if required.
- For printers with an LCD panel, check the screen for any error messages or error codes. If an error message is displayed on the LCD panel follow the appropriate action for that error. The issue would need to be cleared in order to print again, or undertake further troubleshooting if required.
- If an error light or message is displayed, refer to your user guide to determine the cause of the error.
- Make sure A4 size plain paper is loaded in the sheet feeder.
- To access the Head Alignment utility:
- Open Printers or Printers and Faxes / Devices and Printers.
- For detailed instructions on this step, see How to open the Printers or Printers and Faxes folder in Windows
- Open Printers or Printers and Faxes / Devices and Printers.
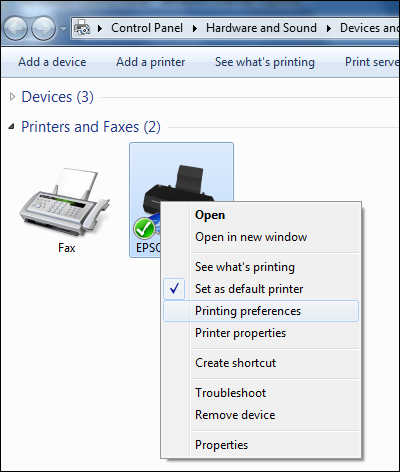
- Right-click on the icon for the relevant printer or All-In-One and left-click on Printing Preferences.
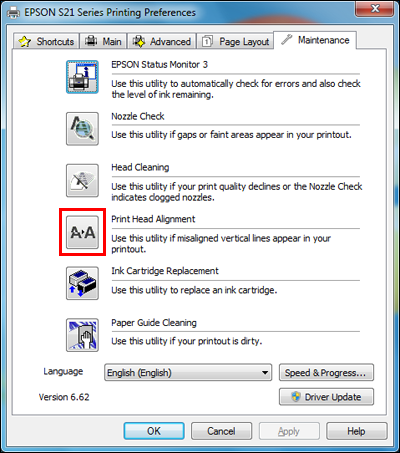
- Click on the Maintenance or Utility tab. Then click on Print Head Alignment.
- Click Next >.

- Click Print.
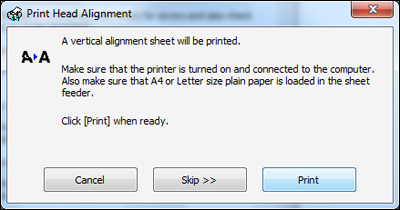
- The vertical alignment sheet will print. Follow the on-screen instructions.
Windows 7, Windows 8 and Windows 10
 Note:
Note:For older models, the alignment pattern is a series of lines. For later models, the alignment pattern is a series of bands.
Please note that the drop-down menus will always be set to a default value. Always read the instructions carefully and select the best match from the pull-down menus.
- Click Realignment or Next > as required and continue to follow the on-screen instructions. After checking and correcting the vertical alignment of the print head, the process will be repeated to allow you to check and correct its horizontal alignment.
|
A Head Alignment test can also be performed using the control panel on some models. Using the buttons on your printer's control panel access the Setup/Maintenance menu then select the Head Alignment option. Follow the on-screen instructions to print out the head alignment sheet and for information on how to adjust the head alignment. For more information on doing this, refer to your user's guide. |