How to perform automatic 2-sided printing with the Auto Duplexer in Windows
Automatic 2-sided printing is available for models with an Auto Duplexer installed. Depending on the model, the Auto Duplexer may be optional and not installed by default.
|
Follow the steps below to enable the Auto Duplex unit in the printer driver:
|
Depending on the device you are using, this setting may not be present. If this is the case, skip to the next step. |
- Open the Devices and Printers folder (for assistance, see How to open the Devices and Printers folder in Windows). Right-click on your printer icon and left-click on Printing Preferences.
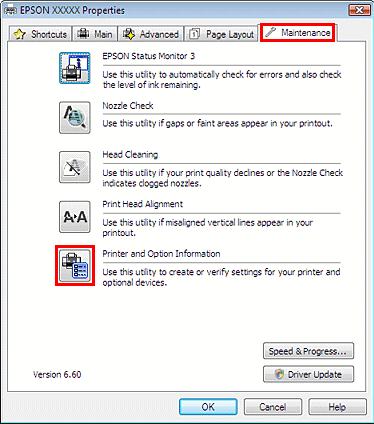
- Click on the Maintenance tab and then click on Printer and Option Information.

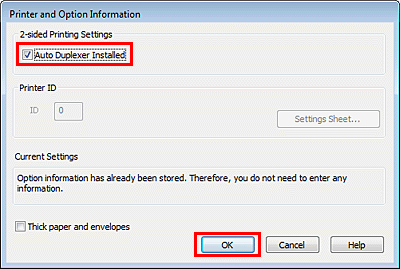
- Make sure the Auto Duplexer Installed check box is selected and click OK to confirm the settings.

- Click OK to close and save the settings in the Printing Preferences window.
Setting the driver to perform automatic 2-sided printing on a one-off print job
To print a 2-sided document from an application you will need to select the duplex option in the printer driver. To do this, follow the instructions below:
- Open a document in your printing application and click File > Print. Make sure your Epson printer is selected in the drop-down box and click the Properties button.
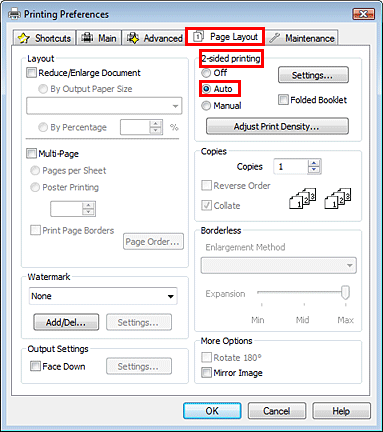
- The Printing Preferences window appears. Click the Page Layout tab and select Auto under 2-sided printing.

- Click OK to save the setting for that print and then click OK again to start the print.
|
Different printer models may have slight variations from the steps above. To ensure you have followed all the correct steps refer to your user's guide which can be located on the Epson website. |
Setting the driver to perform automatic 2-sided printing for all print jobs
It is also possible to set your printer to use the duplex unit as a default setting for all prints. Follow the below instructions to do this:
- Open the Devices and Printers via Control Panel (for assistance, see How to open the Devices and Printers folder in Windows). Then, right-click on your printer and click on Printing Preferences.
- Select the Auto option under 2-sided printing and click OK. This saves the settings for all print jobs.
 Note:
Note:For occasions where 2-sided printing is not required, you can access the printer properties via the 'Print' dialog and deselect this setting for that specific print job only.