Mac colour correction mode and ColorSync for CW-C6x00 Series
This article covers:
- Colour correction/ matching:
- ColorSync
- Color Sync Utility
- Setting ColorSync in the printer driver
-
Epson Color Controls
- None (Older drivers may instead indicate this as “No Composite”)
- Vivid Colors
- RGB vs CMYK generated images
- When to use each colour correction?
Colour correction/Matching:
There are three methods of colour correction:
- Selecting ICC profile from Mac OS with ColorSync option. (Not the ColorSync Utility)
-
The inbuilt ICC profile in the printer
- Using “Vivid Color” on the printer driver
-
Allowing the application software to supply the ICC profile
- Using “None” (Older driver versions may instead indicate this as “No Composite”)
ColorSync
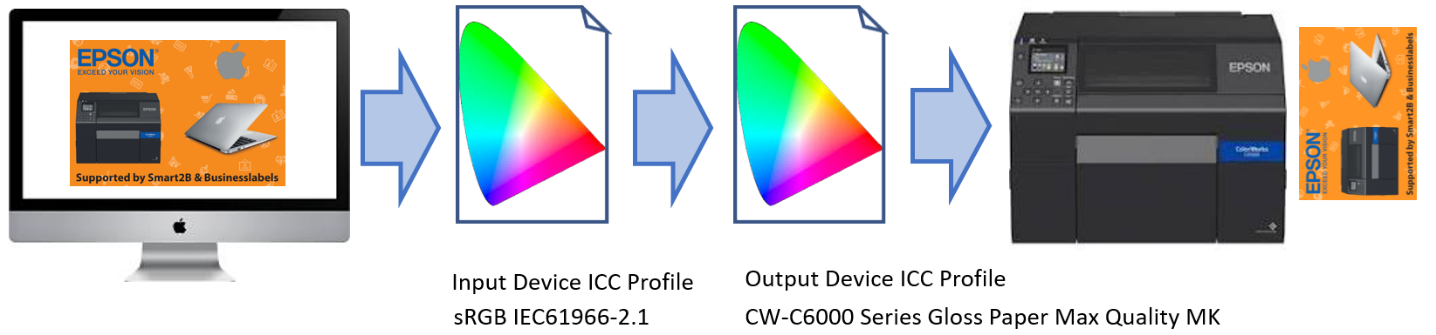
ColorSync is a Mac colour control function to match apparent colour between different devices such as a display and a printer. The colour on the display is transformed to the colour on the printout using profiles. Profiles adhere to the International Color Consortium (ICC) standard.
In Mac the Rendering Intent for ICC transformation is fixed as “Perceptual”. This Intent is effective for processing photographic type images. For more information visit Color Management.
ColorSync Utility
Mac provides the ColorSync Utility, where profiles can be viewed, inspected and compared. Note: this tool is used for management and inspection of ICC profiles including the Epson ICC profiles, but is not applicable to printing.
Open LaunchPad, search for and run the ColorSync Utility

In File >> New Window to open a Window showing the available profile list

In the list of profiles in the section called Other, you will find the Epson Mac driver ICC profiles. The Epson profiles are installed with the Mac Driver or install your own ICC profiles.

The profile sRGB IEC61966-2.1 is always used as the input profile. Note the display profile of Mac is normally “Colour LCD”.

The input profile can be compared with other profiles by using “Hold for comparison”:

Once we hold the input profile sRGB IEC61966-2.1 for comparison, we can select the output profile “CW-C6000 Series Glossy Film Max Quality BK”. Note that it is classed as “Output”.

This tool is useful for assessing the boundary/extreme colour values that the printer can produce and comparing to the input profile, or to other ICC profiles.
| ICC profiles can be found in the folder: Library\ColorSync\Profiles |
Setting ColorSync in the printer driver
Within the print options of the print application (Application “Preview” is used below)
-
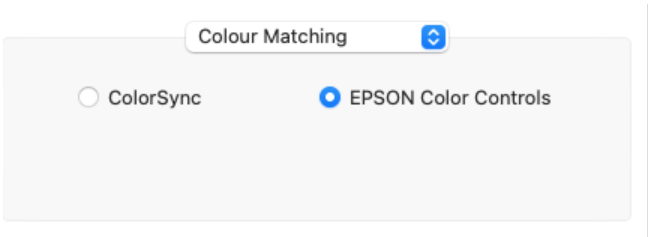
Select the Colour Matching in the dropdown menu. Choose ColorSync and select Automatic from Profile dropdown menu.

-
Automatic applies the parameters specified in Print Settings:

 Note:
Note:Selection of automatic in Colour Matching will apply the profile that matches the Printer Settings. But Gloss Black Ink mode “BK” is the default.
In our updated Takatsu-UG – there is an option of Matte Black (MK) or Gloss Black (BK). For more information, visit the CW-C6000/C6500 Series Technical Reference Guide
-
To choose a profile that instead uses Matte Black “MK” you can carefully select the profile from the options:

ColorSync VS Epson Color Controls for Color Matching
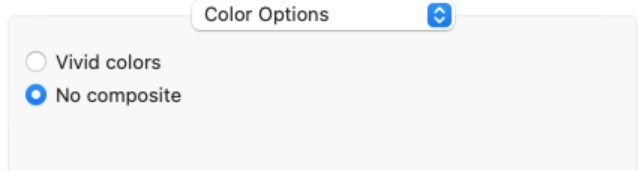
To apply other Color Options, apply Epson Color Controls – which disables ColorSync profiles.
Older drivers may indicate this as “No Composite”)This option is equivalent to using no colour correction by the driver, the printer or the O/S. But it allows the print application to provide the colour correction method to the image.
This option is available to avoid “double profiling” where colour correction is incorrectly applied in two successive operations – to the image by the application and again by the driver. |
Vivid Colors
This is an inbuilt colour space in the printer that conforms to Adobe RGB. Most devices, including LCD monitors, support sRGB but Adobe RGB has a wider color reproduction range than sRGB which makes it a better choice for designers and photographers. The default Vivid Color space can be adjusted for Brightness, Contrast, Saturation, Cyan, Magenta and Yellow in the printer. These values can be adjusted in the print driver and sent with the print job, or the default values can be modified in the printer via the printer panel or Epson Webconfig. Note Vivid Color is named “Business Graphics” in Epson Webconfig.
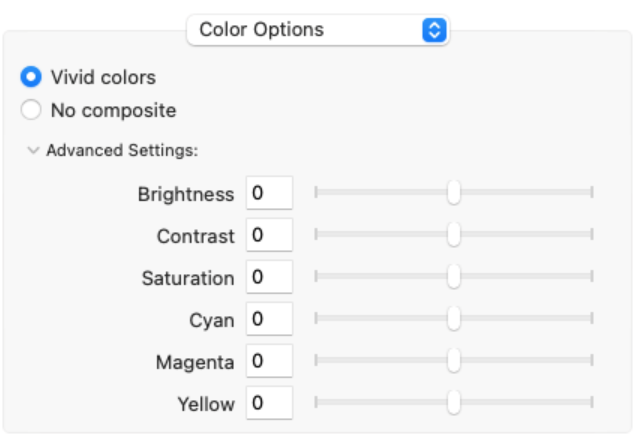
Figure 2: Default Vivid Color settings
RGB vs CMYK generated images
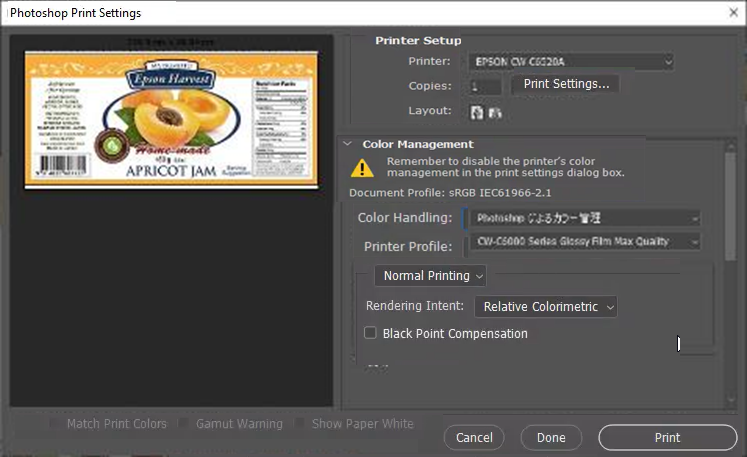
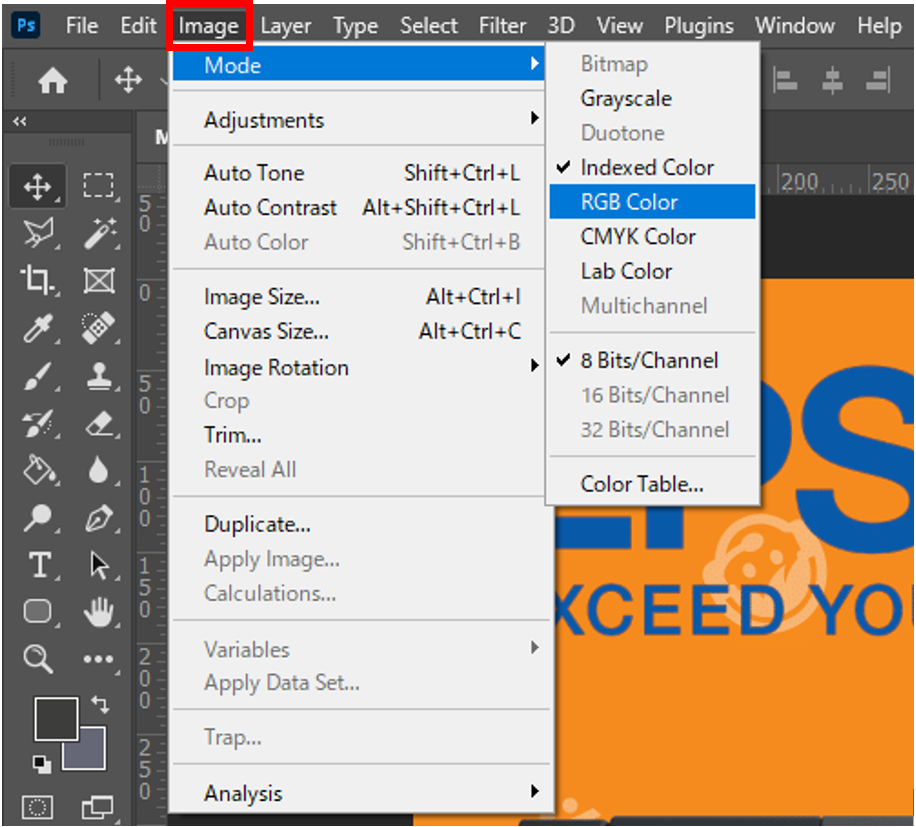
The print results may vary between Windows and Mac even when applying the same print settings, image and colour correction mode. The result is that CMYK generated images are not outputted correctly when printed from Mac. This is due to the differences in the data generation process, Mac uses Script, Windows uses EMF. To improve the Mac print result please try to generate print data in RGB rather than CMYK for Mac, or convert the image from CMYK to RGB. For instance, using Adobe PhotoShop™:
When opening a file you can convert it from CMYK to RGB using Mode:

Apply drop down box of Mode to select “RGB Color”.

Or you can convert an already opened file using Image >> Mode >> RGB Color:
When to use each colour correction option?
| Colour options | Why this option? | Print quality |
|---|---|---|
| Vivid | Simplest and first option to test colours. | Default Vivid Color values are optimised; but allows you to tweak the colours and appearance. This colour space conforms to Adobe RGB, a popular choice for photographic images. |
| Epson ICC profile | More advanced colour matching, where brand is important. | Use “Automatic” to select the best profile based on media, ink type, print mode combination. |
| Own ICC profile | If Epson ICC profile doesn’t match customer requirements | Used in most cases where the customer use their own media and are able to produce ICC profiles. |
| None - (Older driver version may instead indicate "No Composite") | Alternative option to choose ICC profile or colour correction from application instead of the driver, printer of OS. | If no ICC profile is provided, the result may appear darker than default Vivid Colors. |